Showing posts with label preserved lemons. Show all posts

Saturday, March 4, 2017

Today's Fermentation Demo: Program and Notes


I'm doing a fermentation demo and talk today at the Kitchen at Boston Public Market!

If the technology gods are willing, it will be live-streamed on the Real Food Fermentation Facebook page.

I'll be demoing the following recipes, and I'll have samples available:

- Sauerkraut
- Beet Kvass
- Tepache

And if there's time, I'll also demo:

- Preserved Lemons

I've blogged about Sauerkraut, Beet Kvass, and Preserved Lemons before, here.

Tepache is new to this blog, and is a sneak-preview of a recipe from Ferment Your Drinks, my upcoming new book with co-author Raquel Guajardo. When it's officially available, you'll hear lots more about it!

Tepache is a pineapple wine from Mexico. It has low alcohol--maybe a couple of percent--significantly less than beer. This is partly because of its short ferment time (typically less than a week), and partly because it's a wild ferment, so in addition to the yeasts that convert sugar to alcohol, it picks up some bacteria that convert sugar and alcohol to acids.

This means that it is sour. It's great on its own, or as an ingredient in a cocktail of whatever sort.

There are many other nice things about tepache, besides how delicious it is. One is that it allows you to use a portion of the pineapple (the skin) that you would normally just compost or toss. Another is that if you mess up the recipe and let it ferment for too long, you wind up with some nice pineapple vinegar. Hard to go wrong!

Tepache

Ingredients:

- the outer husk and core of one pineapple (the part you can't eat) (I highly recommend this tool!)
- one cup of sugar, ideally piloncillo/panela/jaggery/rapadura/raw sugar/brown sugar
- mixed spices: "pickling spices" will do nicely; make sure they contain no preservatives
- filtered water

Equpiment:

- 2-quart mason jar, with metal ring
- unbleached basket-type coffee filter, or unbleached paper towel, or clean cloth towel

Procedure:

In a 2-quart mason jar, dissolve the sugar in a pint of warm water (body temperature or a little cooler).

Cut the pineapple husk and core into chunks roughly 1 inch on a side. Add it to the jar, along with the spices.

Fill with (room temperature) water to 2 inches below the top.

Place filter or towel over the top of the jar, and secure with ring.

Wait 3 or 5 days, or until foamy and aromatic.

Strain

Drink chilled, or over ice!

Variation:

If you want more alcohol and fizz, try putting a tightly-sealing lid on once it starts foaming, then leave it for up to a week.

Monday, April 20, 2015

Basic Fermenting Recipes

I'm making this post for attendees at the hands-on the workshop I did at Pollinate Farm & Garden in Oakland, California on April 19.

But anyone else is welcome to read the post too. :-)

Please post in the "comments" section below if you have questions, or if you'd like to discuss other ways to eat these fermented foods (I've offered a couple, but I've only scratched the surface).

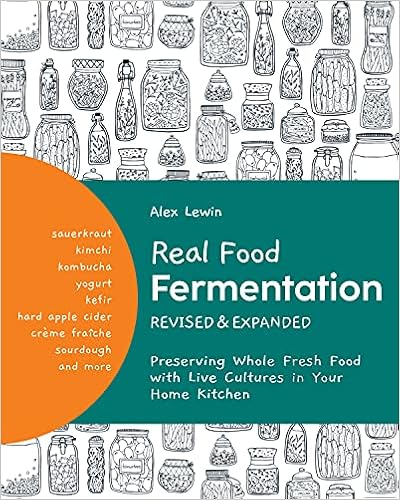
My book, Real Food Fermentation, has more information about fermented foods. Click here for information about how to get the book.

Basic Sauerkraut

Ingredients and Equipment

  • cabbage (round, green or red)
  • salt (1/3 ounce or 2 tsp. per pound of cabbage; or 20g per kg of cabbage)
  • large, sharp chef's knife
  • large cutting board
  • large mixing bowl
  • mason jars, preferably wide-mouthed (a bit more than 16 oz. capacity per pound of cabbage)
  • a digital kitchen scale (available from your favorite brick-and-mortar store, or online)
  • (optional) a thin, narrow-mouthed mason jar to stuff with

Instructions

  • chop cabbage, finely or coarsely
  • put cabbage and salt in mixing bowl
  • squeeze cabbage and salt vigorously with hands until liquid runs freely (this may take a few minutes)
  • put cabbage and liquid in mason jars, leaving an inch or two of "headroom", and close lids
  • leave to sit, not in sunlight, but somewhere you won't forget about it (kitchen counter?)
  • "burp" the jars every day for the first few days (if you don't do this, they may spill over and/or break the top!)
  • it's ready after 4 days or 4 months or somewhere in between, depending on how you like it

Eat it

  • on its own
  • on a sandwich
  • as a side dish with grilled meat
  • juice it!

Mixed/Fancy Kraut

Follow recipe for Basic Sauerkraut, but use a mixture of vegetables instead of just cabbage, slice or cut into shapes and sizes as you like, and/or add herbs and/or spices to taste. Caraway seeds are a classic seasoning; 1 tsp per pound of cabbage is a ballpark amount, although different caraway seeds have different potencies. Things like garlic, ginger, turmeric, horseradish, burdock, etc. can provide nice flavor and health benefits.

Beet Kvass

Ingredients and Equipment

    • a handful of beets (red or golden, number needed may vary with size)
    • 1 Tbsp salt
    • large, sharp chef's knife
    • large cutting board
    • half-gallon mason jar
    • (optional) vegetable peeler 

    Instructions

    • fill jar halfway with water
    • add salt
    • put lid on jar and shake until salt is dissolved
    • if the beets are not organic, peel them
    • cut beets into 1/2-inch cubes
    • put beets in mason jar, to fill about 1/4 or 1/3 of jar
    • fill jar nearly to top with water, leaving an inch or two, and close lid
    • beet greens, if there were any, can be fermented as "Mixed/Fancy Kraut" recipe above
    • wait a 4 days to 4 weeks, tasting the liquid periodically
    • once you like it, strain out the beets and store them separately
    • the liquid is "beet kvass"
    • the fermented beets may be slice and used in a salad, or juiced, or whatever

    Drink it

    Preserved Lemon (Citrus)

    Ingredients and Equipment

    • lemons, Meyer lemons, limes, or citrus of your choice, ideally from a garden rather than from a shop
    • salt (approximately 10% of weight of citrus)
    • knife & cutting board
    • mixing bowl
    • big mason jars
    • (optional) "pickling spice" mix from store (without preservatives; read the ingredients)

    Instructions

    • cut citrus into approximately 1/2 inch (1 cm) squares
    • squeeze citrus over mixing bowl; add the peel to the bowl as well
    • add salt and optional spices to bowl; mix
    • pack the mixture tightly into mason jars, leaving an inch or two of headroom, and close lids
    • let the lemons sit for months or years

    Eat it

    • anywhere you might use fresh lemon
    • in your potato salad (or tuna salad or chicken salad)
    • cook it with fish or roast chicken
    • add a shot of sweetener for a fermented lemonade

    More Things to Read


    Saturday, December 5, 2009

    I Am Teaching A Food Preserving Class, Feb 9 & Feb 16 2010

    Coming up:
    Click here to register
      Here's the course description:
      Since the start of recorded history, humans have been preserving food. Refrigeration and freezing have become popular recently, but many interesting alternatives exist.

      During class 1, we will explore some or all of the following topics: fermentation of vegetables and fruits (including sauerkraut, pickled root vegetables, kimchi, preserved lemons, etc.); cucumber pickles, relishes, and chutneys; brined meat (corned beef); preserved dairy (yogurt, ricotta cheese); kombucha; salting and drying (dried fruit, dried vegetables, dried meats, potato chips); etc.. Along the way, we will discuss food history; food safety; knife skills; and seasoning.

      During class 2, one week later, we will prepare dishes, using some of the preserved foods from class one as ingredients. Menu items may include corned beef reuben sandwiches (with sauerkraut and/or kimchi); traditional Alsatian choucroute; a variety of canapés using chutneys and kimchi; lactofermented cole slaw; broiled chicken with preserved lemons and herbs; baked ricotta; kombucha-poached scallops; etc.
      Click here to register


        If you would like to hire me to do a sauerkraut or fermentation event for you, please email or call me (four one five, five nine six, seven six one three). I can tailor-make an event to fit your group or occasion.

        These are some of my past public events:

        Friday, September 25, 2009

        Reflections On My First Pickling and Preserving Class

        Going into my first cooking class as an instructor, I was nervous. The curriculum and some of the recipes were untested. I didn't know exactly how many people would be in the class, where they would be coming from, or how much experience they would have. I also didn't know whether or not I would have any assistants, or even what I would do if I had them!

        As it turned out, there were 13 enrolled students; 1 school intern; 1 photographer; and 5 (!) assistants. Everyone in the class was a pleasure to work with, and had great kitchen skills. And the assistants were able and tireless; they increased everyone's enjoyment of the class (mine not least of all!).

        We started with a discussion of food preserving. I talked about why it is important for us to be able to preserve food. Then I discussed food safety, and the various factors we can control to prevent food spoilage. This led to a discussion of some of the different methods of food preservation, including freezing, refrigerating, lactofermentation, vinegaring, canning, and drying, with a separate discussion of preserving dairy. Lactofermentation is my favorite preserving method, because it is easy, healthy, safe, and tasty. For more discussion of lactofermentation, check my previous blog post here.

        I shared a few thoughts about kitchen organization, including one of my favorite techniques, which is labeling and dating everything that goes into the fridge! My refrigerator houses many mason jars containing homemade things. If I didn't label and date them, I would lose control of my fridge pretty quickly. I date things I buy, too, so that I know when I opened them, and when it might be time to get rid of them.

        After that, I did a brief knife technique demo, illustrating the benefits of having a large knife, especially when working with large vegetables like cabbage. I also demonstrated methods for cutting up green peppers, onions, and apples.

        After the discussion and demonstration, we moved into the kitchen to work with food. Everyone made some sauerkraut (of course!), then various people made yogurt, kimchi, pickles, other lactofermented vegetables (including parsnips), lactofermented lemons and plums, kombucha, and corned beef; we also made (non-fermented) applesauce and canned it, using the method from the Ball Blue Book. At the end of class, everyone took home their sauerkraut and other lactoferments, to babysit them during the week.

        In the second class, a week later, everyone brought back their various krauts, and we admired their diversity and rainbow colors. After a brief strategy session, we divided into teams, and made dishes using all of our preserved foods from the week before. These dishes included yogurt-cucumber salad; lactofermented coleslaw; mayonnaise and Russian dressing; different kinds of canapés and sandwiches involving raw and cooked corned beef, sauerkraut, kimchi, coleslaw, pickles, etc.; kombucha and salty-sweet preserved fruit and drinks; broiled chicken with preserved lemon; choucroute garnie, "the king of sauerkraut dishes"; and a delicious baked ricotta dish with pine nuts, honey, and dried fruit.

        I will definitely be teaching the class again. Watch this space for dates and times. And if you have suggestions, requests, comments, or questions regarding the class, please add them in the "comments" section of this blog post, below.